Technical Support - Model E
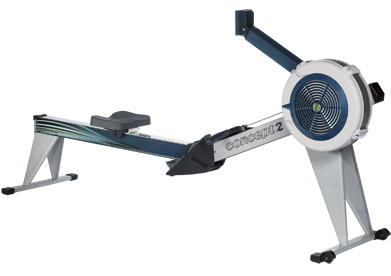
Click on each issue to expand
Chain is skipping or running roughly.
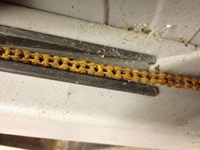
- If caused by stiff links or rust, you should clean and lubricate the chain. See the Chain Lubrication PDF (this procedure is the same for Model C, D and E Indoor Rowers). If the chain continues to skip, the machine should not be rowed and you should contact Concept2 immediately.
- If caused by a worn out sprocket, you should replace the sprocket. See Sprocket Replacement PDF.
Note: When replacing a chain or a sprocket, Concept2 highly recommends replacing both the chain and the sprocket at the same time.
If the chain continues to skip, the machine should not be rowed and you should contact Concept2 immediately.Lack of resistance, handle not retracting all the way and hanging loose.
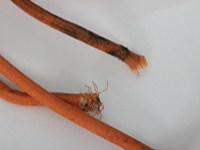
May be because shock cord is too loose due to normal stretching or cold temperatures. Adjust shock cord tension. See the Shock Cord Adjustment PDF (this procedure is the same for Model C, D and E Indoor Rowers).
Replace the shock cord if it is frayed through the outer cover or if it is losing its elasticity. If the shock cord is cold, allow it to warm up.Not enough resistance in the flywheel regardless of damper setting.
- If caused by improper rowing technique you may not be generating enough power on the drive to feel resistance from the flywheel. This machine generates resistance through moving air. The more air the fan moves, either by turning faster or by having more air available because of a more open damper, the harder it will be to spin the fan and the harder the resistance will be. By increasing your work output on the drive, you will be increasing your resistance. This can be proven out by doing the following: Try rowing at a low stroke rate (16-20 spm) and concentrating on rowing each stroke separately with lots of power on the drive, pushing hard with the legs. Try rowing like this at a damper level of 10 for a minute or two, then level 5 for a minute or two, then level 1.
- Or if flywheel is dusty and needs to be cleaned out. Refer to the "Flywheel Opening and Cleaning" section in the Model D and E Indoor Rowers Owners Manual.
Brass Ferrel snapped on the chain swivel
The brass ferrel on the end of the chain swivel column (looks like a miniature crown) is a safety measure to prevent the user from pulling the u-bolt (used to connect the chain to the handle) through the chain swivel. The idea being that the brass ferrel will snap before the swivel breaks preventing injury to the user.
In this case rower should not be used until the ferrel is replaced, because a: its a major safety hazard, b: pressure on the u-bolt from rowing will cause the hole in the swivel to elongate and the metal edge will bow out sideways, which in turn prevents a replacement brass ferrel from fitting correctly.
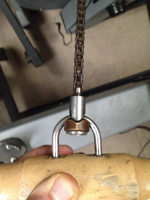
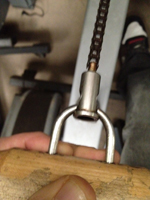
To fit a new ferrel:
- Remove the handle and u-bolt from the chain
- Remove the chain from the rower
- Slide the ferrel on the correct way up from the non handle end
- Re-fit the chain
- Re-fit the u-bolt and handle
Crack forming at a particular point on the frame under foot stretchers.
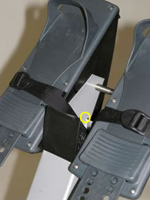
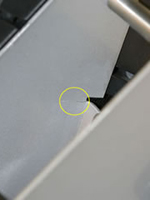
This occurs due to susceptibility to metal fatigue. Applies to Model D and Model E Indoor Rowers shipped between August 1, 2006 and April 19, 2007.
Please email technicalhelp@concept2.co.uk for Strength Upgrade information. Install a Free Reinforcement Kit available from Concept2.
Please contact Concept2 for more information.Scraping noise from inside of front end beam.
The shock cord or chain may be routed incorrectly, worn or may have jumped off pulley. See the Return Mechanism PDF for proper routing of the shock cord and chain. Visit the Concept2 shop if replacement parts are needed.
Monitor is off and won't come on.
- Reset monitor. Insert a pen/pencil tip into the reset hole on the back of the PM4 and press lightly.
- If resetting the monitor doesn't work, check to be sure that the cable connecting the monitor to the Indoor Rower is plugged in and not damaged. Try fresh batteries in the monitor. If the rechargeable battery pack is inserted in your PM4, plug the PM4 via USB cable into a computer to recharge the battery pack.If the problem persists, contact Concept2.
Additional Performance Monitor troubleshooting information is available for each PM model. To view troubleshooting information for your monitor, select either PM3 or PM4.
Seat bumpy when rolling.
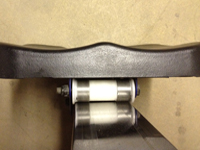
This is usually caused by dirt on seat rollers or monorail, or worn out seat rollers. Clean rollers and monorail. Replace top seat rollers if worn out.
There is black residue on the top of the monorail.
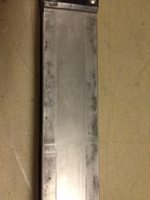
The black flakes on your rail are normal. They are a combination of dirt, perspiration, molydisulfide (a lubricant from the plastic rollers) and a very small amount of the nylon plastic that the rollers are made of.
These four components are subjected to the mechanical action of the rollers and can dry and harden on the rail.
To remove the black residue you should clean the monorail. Wipe monorail with a cloth or non-abrasive scouring pad after use. You can use soap and water or any glass cleaner. Do not use mineral acids, bleach or coarse abrasives.
Seat hits end of track while rowing.
Usually caused by long legs! It is possible that you will hit the end of the monorail while just sitting, but not while actually rowing. We recommend that you try a test row before making adjustments. If you hit the end of the monorail while rowing with the seat rollers in the standard position, you can extend the travel distance of the seat by 1 inch.
Use two 9/16" or 14mm spanners to loosen the bolt holding the rear top seat roller in the seat carriage. Remove the roller and hardware on the rear of the seat. Place the roller and hardware in the next hole over in the same order in which you removed it. Tighten the nut. If this doesn't extend the seat far enough for you, please contact us to purchase an extended length monorail.
Seat wobbles from side to side on monorail.
After extended use, the fit of the seat on the monorail may become loose due to wear on the rollers. You may move the bottom rollers to a tighter hole toward the front of the seat by following one of the following steps.
- The top roller must be removed and the seat slid up to front of monorail and off. Use two 9/16" or 14mm spanners to do this. Use a 9/16" spanner and an Allen key to loosen and tighten the bottom rollers.
- The top of the rear leg must be removed from the monorail using a 7/16" or 11mm spanner and an Allen key. The seat can then be slid off the rear of the monorail. Use a 9/16" or 14mm spanner and an Allen key to loosen and tighten the bottom rollers.

